If you use the Bugcrowd toolkit for web application testing, you can manage Bugcrowd Scanner findings within your WAS account. Our Bugcrowd Suite integration gives you a way to store the findings discovered by the Bugcrowd Suite scanner with those discovered by WAS and share this information with multiple users.
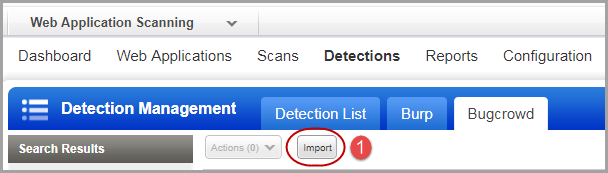
Import Bugcrowd CSV file. Simply, go to Detections > Bugcrowd > Import (1).
Choose a Bugcrowd file in CSV format from your local file system (2) and select the web application that the Bugcrowd file applies to (3). The CSV file containing detections should not exceed 20MB for only one web application.
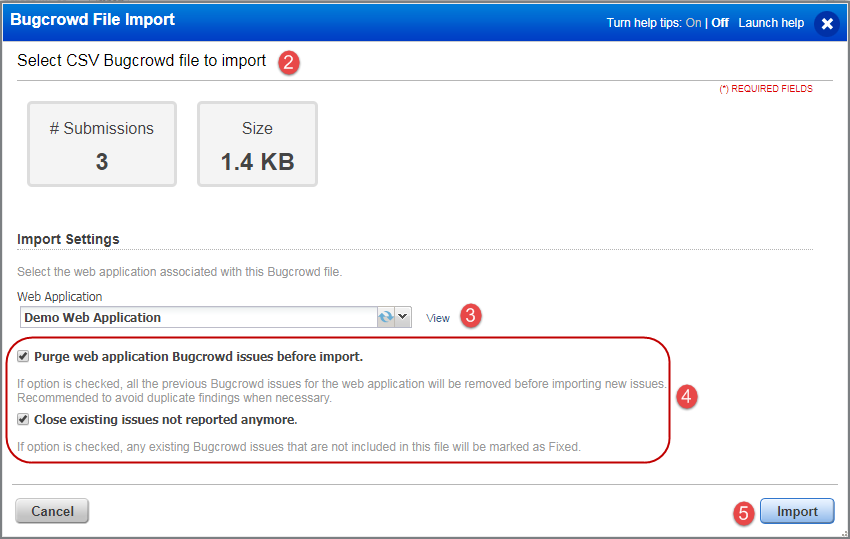
We recommend the Purge option (4) to avoid duplicate findings when importing from multiple Bugcrowd instances and then simply click Import (5).
You can import a file that is no more than 20MB and that contains detections for one web application. The Purge option will remove any existing Bugcrowd issues for the selected web application before importing the report. If you import from more than one instance of Bugcrowd, you may want to use the Purge option to avoid importing duplicate findings. The Close option will close the web application's existing Bugcrowd issues that are not in the report. If you choose Close but not Purge, the closed issues will be marked as fixed.
The preview pane appears under the file list when you click anywhere in a report row.

The issues imported with your Bugcrowd file are displayed in the issues list. Go to Detections > Detections List.

The Detection List displays security findings discovered by our cloud security service, Burp findings and Bugcrowd findings that you import. In the Filter Results select Bugcrowd Finding Type and the list will display only Bugcrowd issues. You can view issues in detail - including detection dates, status and severity.
You’ll see a Bugcrowd severity assigned to each issue - High, Medium, Low or Info. A False Positive is assigned the Low severity.
Just select View from the Quick Actions menu to see the Bugcrowd issue details. You'll have the option to ignore the issue if you want.
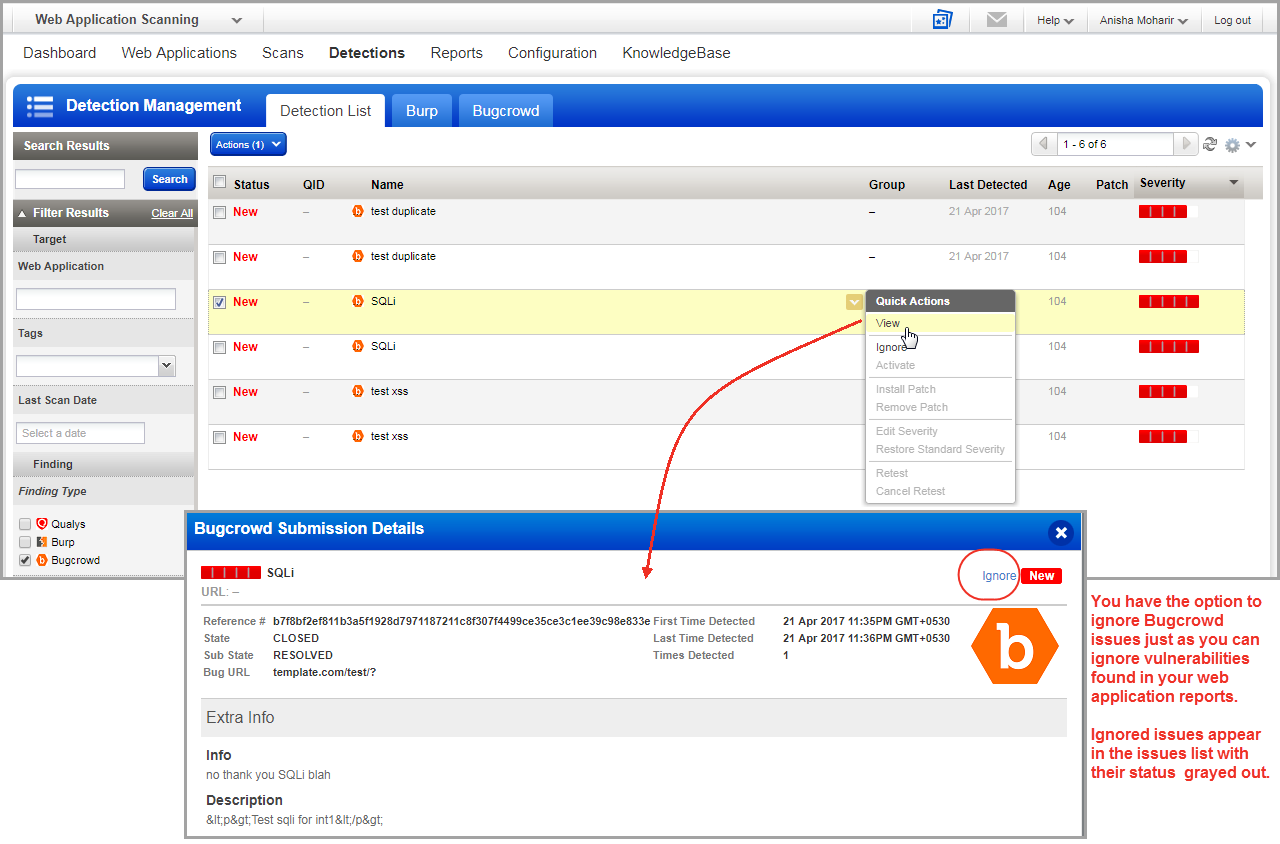
The preview pane appears below the list when you click in a row in the issues list. The preview displays the issue severity level, the URL where the issue was detected, the web application name, vulnerability group and status, the Reference number, confidence and location, the dates when first detected and last detected and the number of times the issue was detected.

Hover over the issue and choose Ignore from the Quick Actions menu, or double click the issue to display the details then click the Ignore link in the top right corner of the details window. When you ignore an issue, you'll be prompted to give a reason - false positive, acceptable risk or not applicable. The status label is grayed out in the list and a message on the issue details page shows your reason for ignoring the issue.
The Activate action reverses the Ignore action. The status will no longer be grayed out in the list and the vulnerability will appear in web application reports.
You might need to request permission from your account manager. Learn more
Note - Bugcrowd Management is not available to Express Lite users.