We support integration with multiple third party password vaults. Check our vault support matrix to know the vaults supported for each authentication type.
Launch an authenticated scan on a target machine where the authentication record for the target specifies a vault type and vault record. We'll send a request to the scanner appliance with information defined in the vault record. The appliance uses this information, along with information from the authentication record, to request sensitive information from the vault - the password for a given user name, the private key and/or private key passphrase for a given certificate, the password for root delegation. The information requested depends on the host technology and authentication record settings. The scanner appliance must be able to access vault endpoints for successful retrieval of credentials.
The appliance uses the information retrieved from the vault to log into the target machine and perform the trusted scan. After performing the scan, the scanner appliance deletes every trace of the password and/or private key, and sends the scan results to the Qualys Cloud Platform and these results are available in your account.
Go to Assets > Host Assets to add the IP addresses/ranges you want to scan. We also recommend you organize assets into asset groups and/or apply asset tags. This makes it easier to manage your assets for scanning and reporting. Learn moreLearn more
Asset Groups – Logically group assets by importance, priority, location, ownership, or something else – whatever makes sense for your business. Go to Assets > Asset Groups to get started.
Asset Tags – Automatically discover and organize your assets using tags – this will ensure that your scans and reports are always synchronized with your dynamic business environment. Go to AssetView to create and manage tags.
Scanner Appliances (physical or virtual) are required to scan devices on internal networks. Go to Scans > Appliances to add a new appliance and configure it. Want some help? Just go to Help > Online Help and we’ll explain all the options.
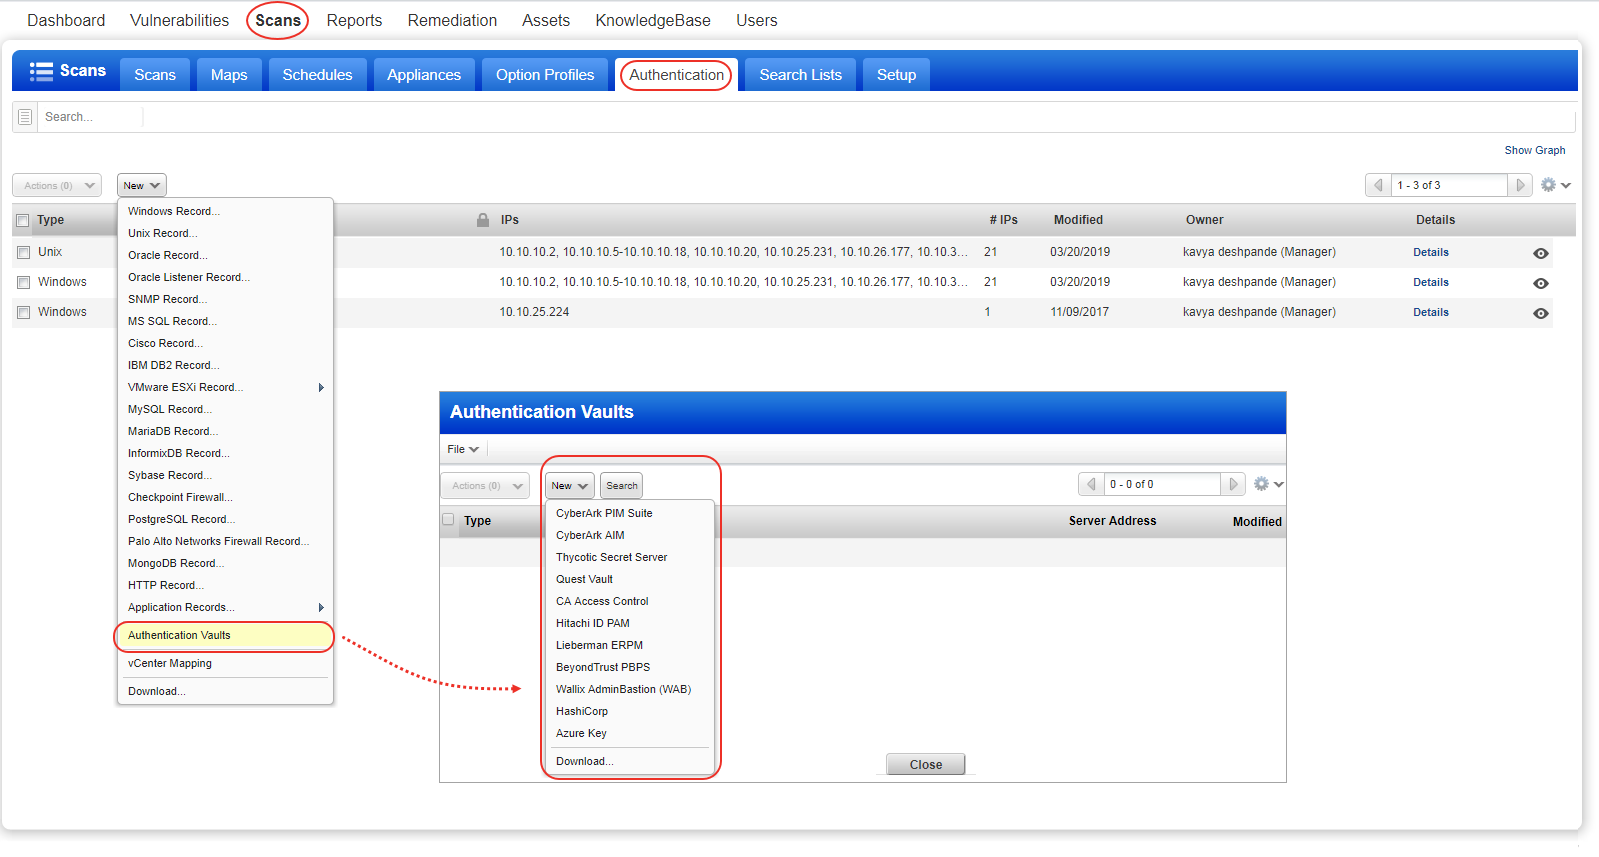
Go to Scans > Authentication > New > Authentication Vaults. Then choose your vault type from the New menu. When the vault record appears, you'll need to provide vault credentials to securely access sensitive information stored in the vault.
Review the help for your vault type (just click Launch Help in the vault record) to understand the types of credentials that can be stored in the vault and how to retrieve them at scan time. Each vault has their own set of requirements.

Go to Scans > Authentication > New and choose the authentication type you're interested in (Windows, Unix, Oracle, IBM DB2, etc.). In the record, you'll choose the Authentication Vault option (or Get password from vault: Yes). Then choose the vault type and select the vault record you created in the previous step. For each vault type there will be additional information required. The information required depends on the vault type. Please refer to the help for your vault type.
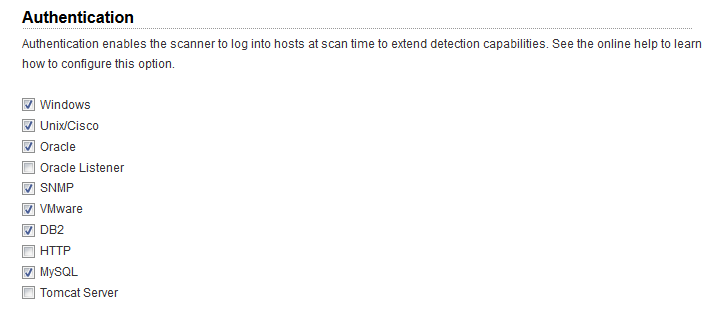
Go to VM/VMDR > Scans > Option Profiles. Create a new option profile or edit an existing one, go to the Scan settings, scroll down to Authentication, and select technologies for the hosts you want to scan. (Authentication is always enabled for PC scans so there is nothing you need to do for this step.)

Go to Scans > New > Scan. Remember online help is always available to help you along the way.
Viewing scan results: For each scan we report authentication status in the Appendix section of the scan results. You’ll see hosts that 1) passed authentication, 2) failed authentication, and 3) passed authentication but the login account had insufficient privileges.
Running a scan tests how Qualys scanners query passwords from the target vault.
We recommend you run the Authentication Report: This report tells you the pass/fail status for scanned hosts. If authentication failed on a host then we tell you the cause so you can resolve the issue. In case of a password query failure with any available API, error codes will be included in the report. Learn more