Some of our compliance checks require secure access to WMI service to successfully perform compliance assessment. For this reason we recommend you to set the WMI service to run securely by increasing the authentication level to Packet Privacy.
We require high authentication level to scan the following namespaces and associated controls:
Namespace: root\CIMv2\Security\microsofttpm
CID 11279 - Status of the 'Trusted Platform Module (TPM)' (Activated) on Windows
CID 11287 - Status of the 'Trusted Platform Module (TPM)' (Enabled) on Windows
CID 11288 - Status of the 'Trusted Platform Module (TPM)' (Owned) on Windows
CID 17194 - Status of the version of Trusted Platform Module(TPM)
Namespace: root\CIMv2\TerminalServices
CID 11478 - Current list of Groups and User Accounts granted the Remote Desktop Connection privilege
Namespace: root\CIMv2\Security\MicrosoftVolumeEncryption
CID 14412 - Status of the 'ProtectionStatus' attribute for all hard disks on the host that can be encrypted using Bitlocker (using WMI query)
See steps below for providing access to Remote WMI for the scan user account.
The scan user account must be part of the following groups:
- Performance Log Users
- Performance Monitor Users
- Remote Desktop Users (For Remote login)
- Remote Management Users
- Distributed COM Users
Some of our compliance checks require secure access to WMI service to successfully perform compliance assessment. For this reason, we recommend you to set the WMI service to run securely by increasing the authentication level to Packet Privacy. Want to lean more about authentication levels? Go here.
You'll need to run the following command on each host that you'll scan for the above mentioned namespaces and controls.
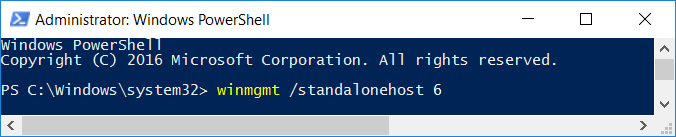
Open "cmd" (Run as Administrator) and run the following command:
Then restart the Winmgmt service (Windows Management Instrumentation):
Open Run (Win + R) and type "Services.msc". Find "Windows Management Instrumentation", right-click and select Restart.
Follow these steps:
1) Using an administrator account, log on to the computer you want to monitor.
2) Go to Start > Control Panel > Administrative Tools > Computer Management > Services and Applications.
3) Click WMI control, right-click, and then select Properties.
4) Select the Security tab, expand Root, and then click CIMV2.
5) Click Security, and then select the user account used to access this computer. Ensure you grant the following permissions: Enable Account and Remote Account.
6) Click Advanced, and then select the user account used to access this computer.
7) Click Edit, select "this namespace and sub namespaces" in the Apply to field, and then click OK.
8) Click OK to close the Advanced Security Settings for CIMV2 window.
9) Click OK to close the Security for Root\CIMV2 window.
10) In the left navigation pane of Computer Management, click Services.
11) In the Services result pane, right-click "Windows Management Instrumentation", and then click Restart.
Follow these steps:
1) Open "dcomcnfg" from Run (Win + R).
2) Click on Component Services > Computers > My Computer > Right click > properties.
3) Go to COM Security tab > Launch and Activation Permissions > Edit Limits.
4) Add the "scan user" and allow all permissions on the same.
You must allow WMI traffic through the firewall of the monitored application server. The following procedure walks you through allowing WMI through the Windows Firewall.
Follow these steps:
1) Using an administrator account, log on to the computer you want to monitor.
2) Go to Start > Control Panel > Security Center.
3) In the left navigation pane, click Windows Firewall.
4) In the left navigation pane, click Allow a program through Windows Firewall.
5) Select Windows Management Instrumentation (WMI), and then click OK.